Menu
Menu
You've mastered the basics—bleeds, crops, CMYK, and file setup are second nature. Now you're ready to take your print files to the next level with preflight tools, quality control settings, and efficiency-building workflows that help you move fast and print like a pro.
Here’s how to get your files as close to "lights out" as possible, meaning they fly through our prepress checks without a hitch.
Preflight profiles in InDesign let you catch issues before you export. You can customize these checks to flag things like RGB images, low-resolution files, missing fonts, or overset text.
Go to Window > Output > Preflight.
Click the panel menu (three lines in the corner) and choose Define Profiles.
LINKS
Links Missing or Modified
Inaccessible URL Links
COLOR
Transparency Blending Space Required (select from the dropdown)
CMYK
Overprinting Applied to White or [Paper] Color
[Registration] Applied
IMAGES and OBJECTS
Image Resolution
Color Image Minimum Resolution: 150
Grascale Image Minimum Resolution: 150
1-bit Image Minimum Resolution: 800
Optional: Bleed/Trim Hazard (TIP: You can set up different profiles for different artwork!)
TEXT
Overset Text
Font Missing
Dynamic Spelling Detects Errors
Unresolved Caption Variable
DOCUMENT
Bleed and slug settings: Check that document bleeds are set properly (you'll handle this at export too)
Activate your new profile during layout to see a red or green indicator in the bottom bar.
This tool is your best friend for final color and separation checks. It lets you simulate how the file will print—including spot colors, CMYK builds, and knockout/overprint behavior.
Open your exported PDF in Adobe Acrobat Pro.
Go to Tools > Print Production > Output Preview.
Toggle off/on separations to verify CMYK values and spot color usage.
Use the Simulate checkbox to preview overprints and transparency.
💡 What is Overprinting?
Overprinting is when one color is printed right on top of another, instead of cutting out the shape underneath. It can be helpful for things like rich black, but if used by accident, parts of your design might not show up correctly when printed. Always check your overprints in Output Preview before sending us your file.
Organizing your files with clearly labeled layers helps streamline everything from finishes to versioning.
Tips:
Group design elements, dielines, finishes (foil, varnish), and notes on separate layers.
Lock non-editable layers to avoid accidental changes.
Use consistent naming conventions.
Sending final art to print isn’t always the end. Organizing your packaged files with a naming convention and version history makes things easier if updates are needed later.
Go to File > Package.
Include fonts, linked images, and instructions.
Save the package folder with a clear name (e.g., ProjectName_FINAL_v3).
Compress (.zip) the folder before sending to us.
Create a PDF export preset that includes crop marks, bleeds, font embedding, and high-res image settings—and then use it every time. If you're working with another printer, ask them if they have a preset they recommend. This is a best practice when sharing files with any print vendor.
To install, open File > Adobe PDF Presets > Define, click Load, and select the .joboptions file you downloaded. Once installed, this preset will work across all Adobe applications.
✅ Make sure you still select “Use Document Bleed Settings” at export.
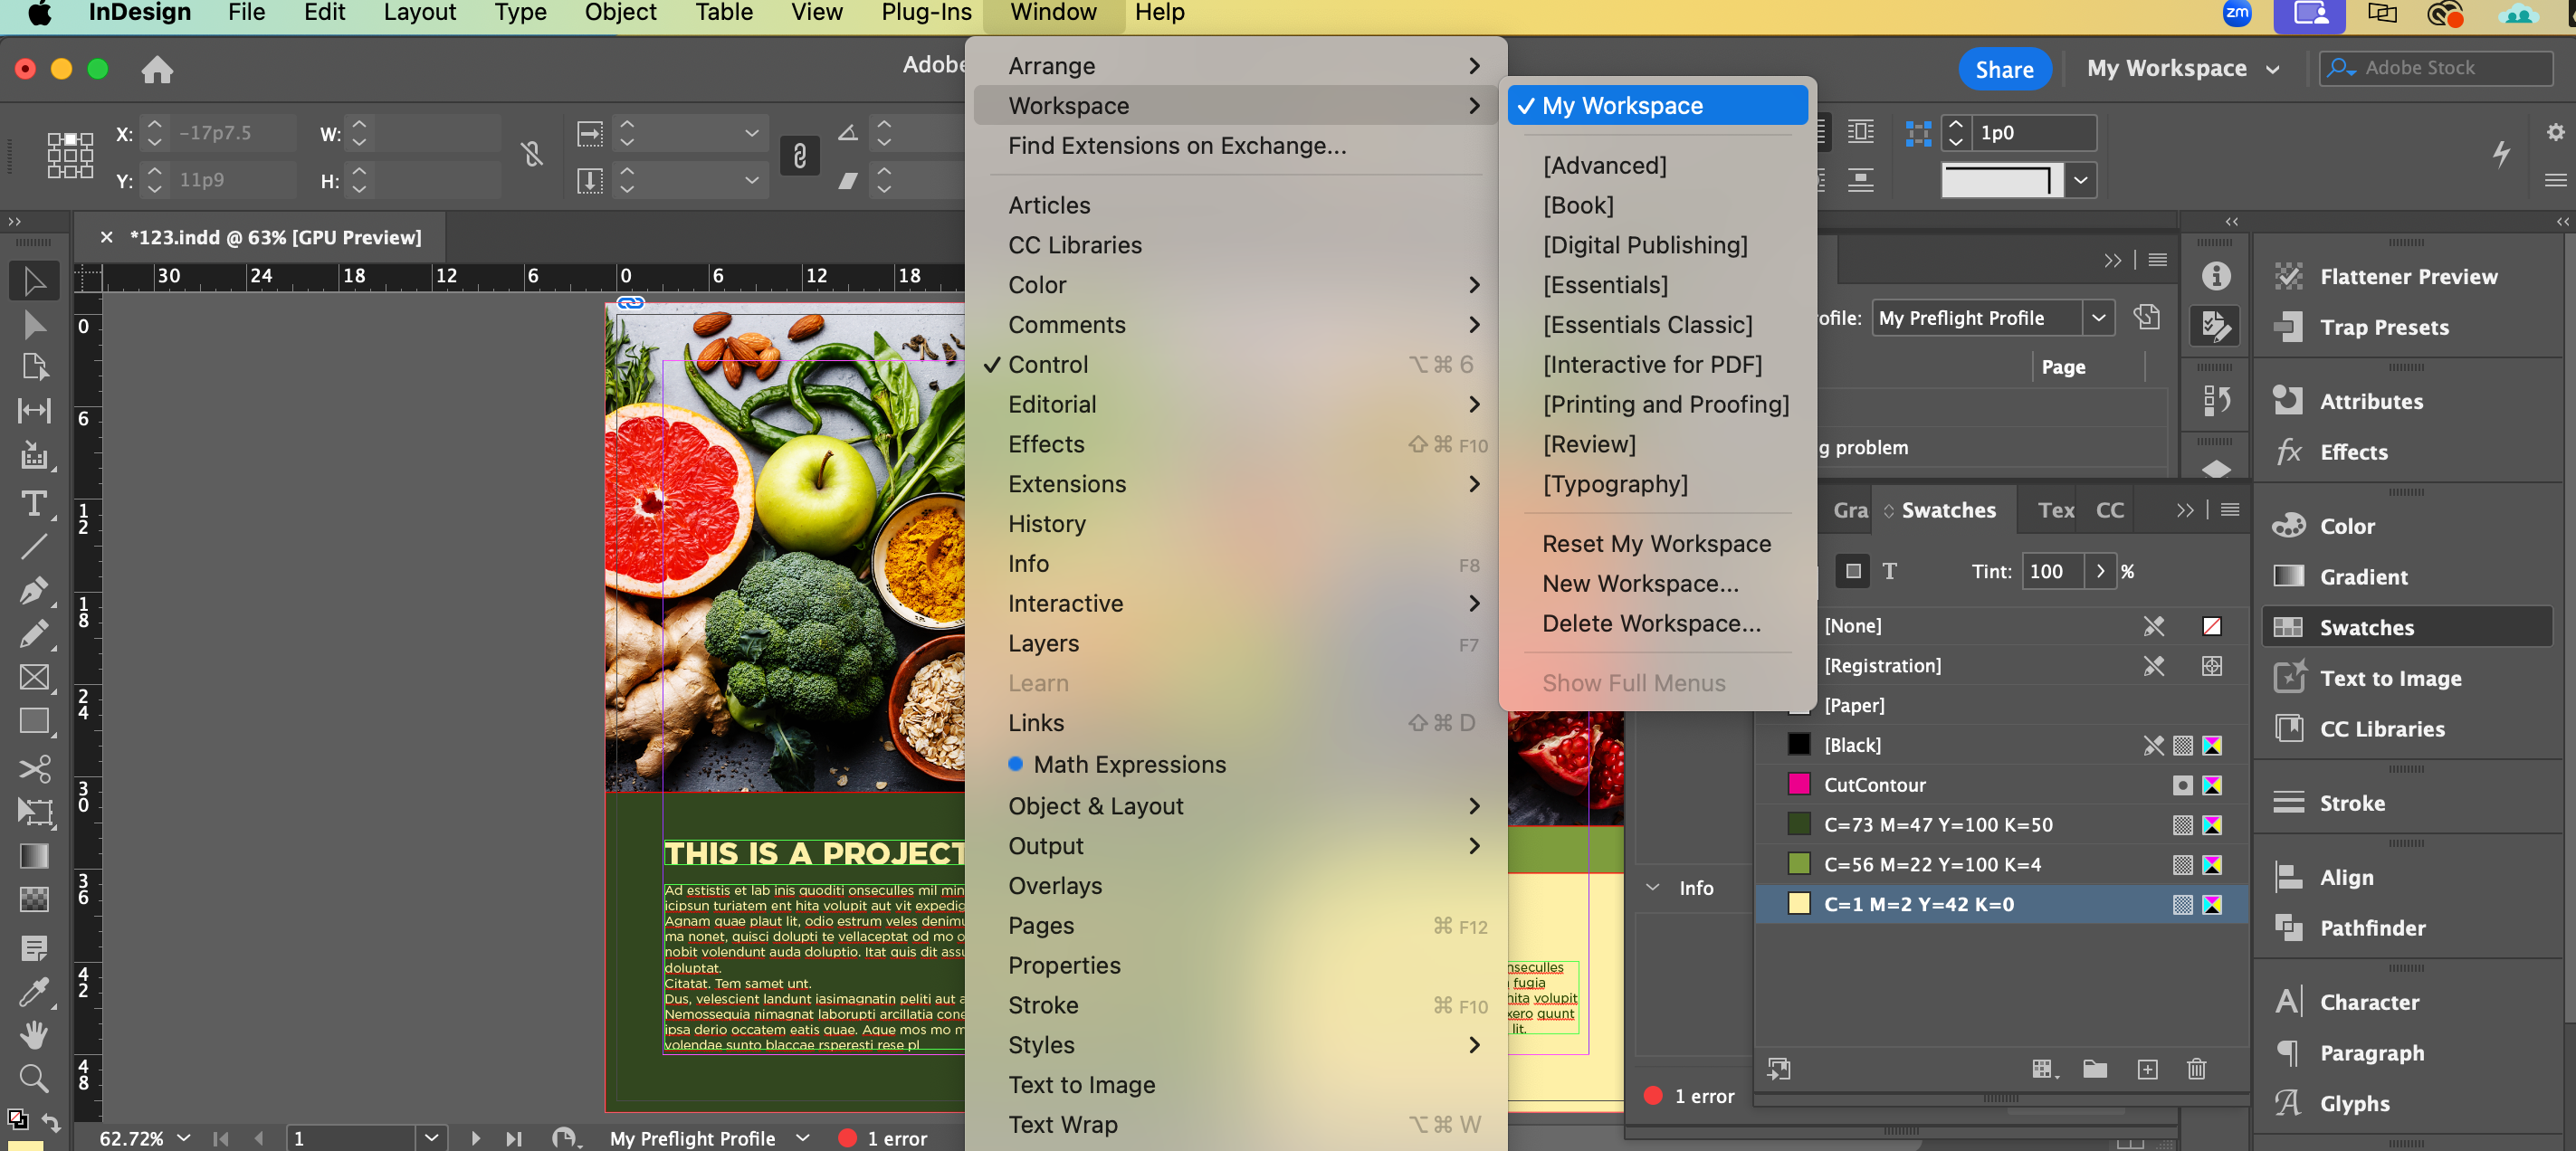
Customize your Adobe workspace with panels and shortcuts you actually use. Save it and stay efficient.
Suggestions:
Include the Links, Layers, Swatches, Output, and Preflight panels.
Save your layout via Window > Workspace > New Workspace.
Want your workspace to look the same every time you open Adobe? After customizing it, switch to it at the top right of your screen each time you launch the program. You can also set it as your default startup workspace in Preferences > General by enabling “Reset Workspace on Launch.”
Standard naming conventions reduce miscommunication and help your future self (or coworkers) make fast decisions without file guessing games.
Tips:
Use date or versioning: ClientName_ProjectName_v2 or YYMMDD_Project_FINAL
Archive working files, outlines, and final exports in separate folders
We’re real people over here, and we’re happy to chat if you ever get stuck. Whether it’s walking through export settings, sorting out a tricky file, or just making sure things look the way you want — give us a call or send a note.
The goal is simple: make your print files easy to work with so everything moves smoothly for you and for us.